I am a tweet developer?
Introduction
So recently I have been confronted on Twitter by a "developer" and his "non-developer very wise friend" (I assume) just because I offered assistance in enhancing the experience given by a company on their social media bots. It did not bother me for once that I was made fun of - that is nothing new to me and bullies exist. However, it did bother me that they did not understand the fact each of these social networking platforms has its own very dedicated community that develops on their bot APIs and their libraries. I know about these communities since I have worked with a few of them on various projects that we did on social networking platforms such as Telegram, Viber, ClubHouse, and many more that I do not even have a count of. And for most of it, I did document my experience and the knowledge I have gained from them either on blog posts or YouTube tutorials which you can review in case you are interested. Perhaps these two "very brilliant and very well-educated people" did not know about these communities since their focus and mindset is much on using a "single platform" that can connect or "drag, and drop" plugins for each of these social networks that are developed using the earlier mentioned libraries and APIs. In most cases, it works but within the limitations of the said "drag and drop platform" imposes and there is nothing wrong in using them as long as the purpose you are looking for is achieved. However, when you are to overcome these said limitations to maybe enhance a service or experience given or to add more functionalities that the "drag and drop platforms" do not include, you do not have much of a choice but to build a custom one of your own - and this process of development is sometimes known as "tailor-made for the requirement".
Now that you know a bit of the back story and my stance on this conversation, you might be asking why I am making such a fuss about a "tweet developer". I promise you that I will tell you in just a very short bit, but please allow me to rant a bit more. Within this said conversation I was also told that there is a lot for me to learn and we do not just become a developer by tweeting. Fair enough! Agreed! I never claimed I am the best out there, no do I even consider myself a "good" developer. I do have a lot to learn and I do learn something new every day and I will continue learning until my last breath. Probably the willingness to learn, study, and be taught is something that is in the blood of people like me who loves trial and error and does a lot of R&D rather than crediting a diploma, degree, or a Ph.D. (none of which I have). Also in this same conversation, I was addressed as a "tweet developer". And yes, that really hit a nerve. Well, let's live up to the hype and do a "tweet development" at least once so that as far as I am concerned we close this chapter once and for all. I assure you that this will be the last time you will hear me talk or write about this.
For the purpose of this post, I will demonstrate everything you need to know in creating a Twitter bot that uses the stream endpoint of the Twitter API to watch for any new tweets that mention a specific username and contain the hashtag #WhenDidIJoinTwitter and finally - programmatically responds to the tweet with some publically available data of the user who tweeted, thus a "tweet developer" doing "tweet development".
As usual we will be using Python, and for this project I had used Python 3.10.2. The only additional python dependencies we would require for the project is requests-oauthlib~=1.3.1 and requests~=2.28.1. Ok now, without further ado let's jump right into it.
Getting access to Twitter API:
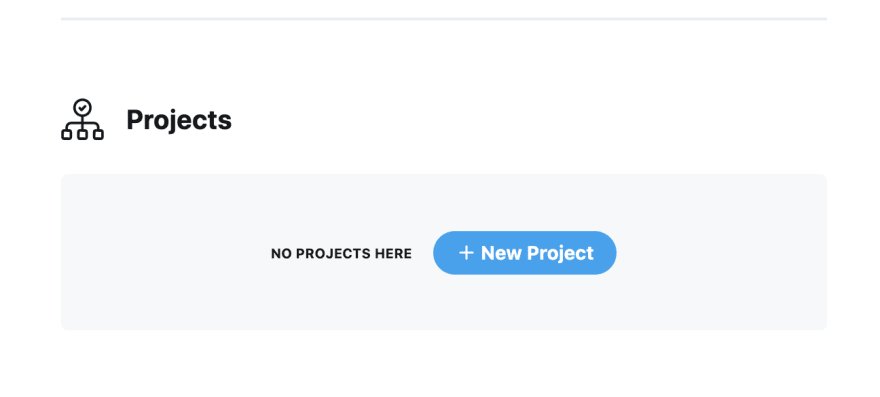
In order to get access to Twitter API, you need to have a Twitter developer account for which you can apply from this link. If your Twitter account is in good standing - you will get access to the developer portal instantly as you apply and complete the process. Once you have access to the developer portal let's create a new project - giving it a name, the use-case, and a project description.
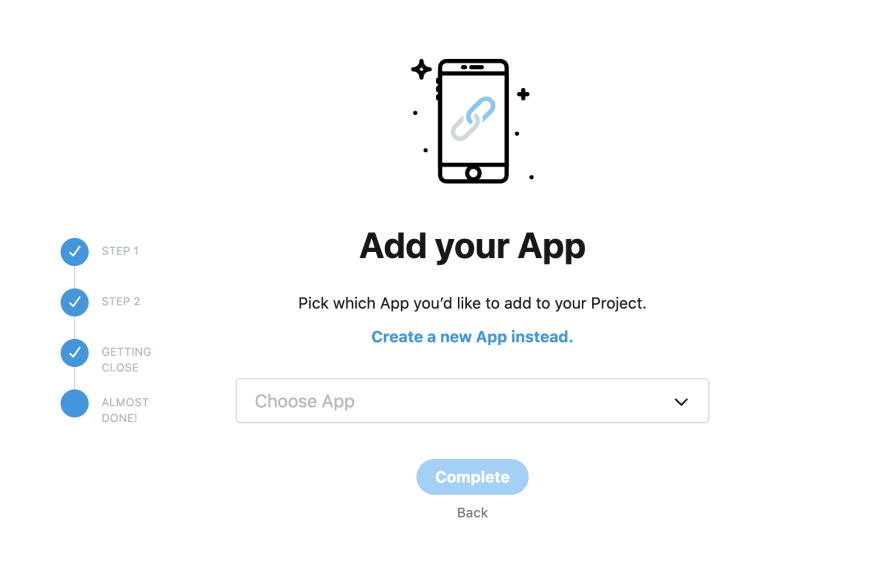
When you complete creating the project you will be given options to either create a new application or attach an existing app. Let's create an App by clicking ‘create a new App instead’ and giving the App a name. Here as far as the Twitter developer portal is concerned an "App" is a container for the API Keys that you would require in order to make an HTTP request to the Twitter API, in other words, the keys required to communicate with the Twitter API.
Once you click complete, you will be presented with your API Keys and the Bearer Token on a similar page as shown in the below screen capture.
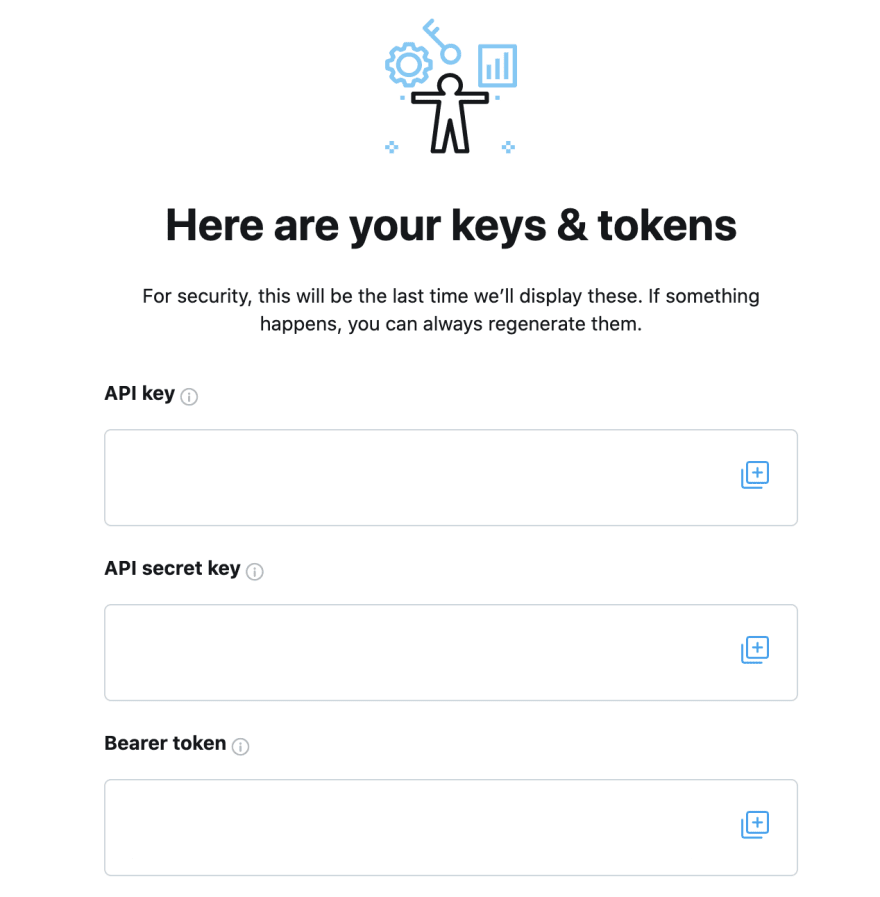
Make a note of the API key, API secret key, and Bearer token. Once you leave this page you will not be able to see these again. However, if you lose these keys and tokens it is still possible to regenerate them. With this, we are almost done with setting up the project at the developer portal and start coding - remember not "drag and drop" unlike our very brilliant and very well-educated friends would have done.
Finally, within the App settings, you would need to set up "User authentication settings". Change the App permissions to "read and write" Tweets. And set "Type of App" as Automated App or Bot from the dropdown. Also, enable the usage of OAuth 2.0 and OAuth 1.0a authentication methods.

While at this page of user authentication settings, you will be also required to provide a Callback URI/Redirect URL and a Website URL for your app.

The OAuth 1.0a User Context and OAuth 2.0 Authorization Code with PKCE authentication methods allow developers to make requests on behalf of different Twitter users that have worked through a specific sign-in flow. As users work through these flows, they need a web page or location to be sent to/redirected to after they have successfully logged in and provided authorization to the application. This follow-up webpage or location is called a callback URI. I will give you a more in-depth explanation of which authentication methods we will use within our application, why, and what they are in just a bit.
Since we will be using the pin-based version of the OAuth 1.0a User Context you can simply fill Redirect URL with a valid URL - probably with the link to your website.
Authentication methods used:
As mentioned earlier we will be using both pin-based OAuth 1.0a and OAuth 2.0 Bearer Token also known as app-only authentication. App-only authentication doesn't include any user context and is a form of authentication where an application makes API requests on its own behalf. This method is for developers that just need read-only access to public information and performs actions such as:
- Pull user timelines
- Access friends and followers of any account
- Access lists resources
- Search Tweets
Well, that is perfect for us to call the Stream API Endpoint and look for new tweets matching our expected criteria isn't it?
To perform actions on behalf of a user such as:
- Post Tweets or other resources
- Search for users
- Use any geo endpoint
- Access Direct Messages or account credentials
- Retrieve user's email addresses
In our case to like also known as managing likes and to reply to the tweet also known as create tweet, you need to be authenticated with OAuth 1.0a User Context as app-only authentication does not allow to perform such user context actions. And the OAuth 1.0a PIN-based OAuth flow is intended for applications like ours that runs on a console and cannot access or embed a web browser to redirect the user after authorization. However, even with PIN-based OAuth flows the user still visits Twitter to login or authorize the app just like any other OAuth 1.0a method, but they will not be automatically redirected to the Redirect URL upon approving access. Instead, they will see a numerical PIN code, with instructions to return to the application and enter this value to finally complete the authentication.
Here is the function we use to create an OAuth 1.0a session:

Within this function:
- We obtained the request token and its secret by creating a POST request to https://api.twitter.com/oauth/request_token. This request was constructed with the values:
- Consumer Key and Consumer Secret that we had noted while we created the app in developer portal.
- And then we generated an authorisation URL and logged it to the screen so that we could browse to this link away from the console and collect the Twitter generated ~7 digit PIN. When the PIN is input we assigned it to a variable called as a verifier.
- Finally to obtain access token and its secret which is the final piece of puzzle in requirement to construct the session object, we do anther POST request to https://api.twitter.com/oauth/access_token. This POST request contains the values:
- Consumer Key and Consumer Secret just as before,
- The oauth_token and oauth_token_secret we collected at the very first POST request of the function.
- The verifier - Twitter generated ~7 digit PIN.
- Finally with the access_token and its secret in hand we constructed the session and returned it.
Here is the callback function that we use to create the authentication mechanism for requests using OAuth 2.0 Bearer Token:

Filtered Streams:
Now that we have the required authenticated session let us look into which endpoints in the stream group we require and what those enpoints do for us and how we are going to utilise them within our app.
The filtered stream endpoint group enables us to filter the real-time stream of public Tweets and it contains endpoints that allow us to create and manage rules, and apply those rules to filter a stream of real-time Tweets. Which also means in our workflow we will be:
- Creating a set of rules and apply it to our stream.
- And then we will establish a streaming connection to the endpoint - to start receiving content matching the rules we set.
Creating Rule/s:
Rules are made up of one or many different operators that are combined using boolean logic and parentheses to help define which Tweets will be seen on our stream. A rule can contain more than one operator defining the logic and the operators are very standard operators that we commonly use, and you would be very familiar with them in case you "code" - unlike the "drag and drop - developer army" i.e. operators such as "AND", "OR", "NOT", "IS", "HAS". Also one more thing to take note is that all the operators can be negated adding "-" in front of the operator other than "sample:" and "-is:nullcast".
Now let's construct the value/query for our rule. Basically we want to filter any tweets that mentions a certain username, has the hashtag #WhenDidIJoinTwitter, and omit any tweets that are a reply, quoted tweets, and retweets.
For the purpose of this demonstration I am going to use my username you could replace this with any of your choosing. That being said our query should look like this:
"@eyaadh #WhenDidIJoinTwitter has:hashtags has:mentions -is:reply -is:retweet -is:quote"
Adding Tags to Rules:
As mentioned earlier, a stream can contain multiple concurrent rules. Once you start the stream connection you will start seeing tweets matching any of these rules, and to be able to differentiate and to identify the tweets matching a certain rule we could pass in a tag. With the tag being introduced the tweet payload response we get with the filtered tweets will contain a tag field.
However, since we only have a single rule I am going to skip adding a tag on this rule we define in this project.
Adding the Rule/s to the Stream:
Here is the function we use to add rules to the stream:

Within this function we are:
- Doing a POST request to the endpoint https://api.twitter.com/2/tweets/search/stream/rules, that contains a JSON Payload with the "add" object containing the value/query for the rule.
- The authentication mechanism we use for this request is OAuth 2.0 bearer token. Regarding it and callback function was shown and explained earlier within the post.
- Once the response is received we look for the HTTP status code. 201 is a success, otherwise we raise and Exception. We also log the response to the screen so that we have details of what is going on.
Connecting to the Stream:
By default when once we connect to the stream we will receive the default Tweet object fields with the response which is only the tweet id and text. And if we wish to receive additional fields beyond id and text, we will have to specify those fields with the field and/or expansion parameters in our request that we do to the stream endpoint.
As mentioned earlier also a requirement of the project is to respond the received tweet with some publically available data of the user who tweeted, therefor just the tweet id and text would not be enough for us to perform this action thus we are going to request three different sets of fields from different objects:
- text, author_id, entities from the tweet.fields.
- id, name, username, created_at, public_metrics from the user.fields
- author_id from expansions
Now that we know the fields we wish to receive with Tweet objects lets finally connect to the stream, here is the function that we use to connect to the stream:

Within this function we are:
- Doing a GET request to the endpoint https://api.twitter.com/2/tweets/search/stream, with the parameters mentioning the fields we would like to receive.
- Also you would have noticed that we set stream parameter of this request to True. By default this parameter is set to False on requests library, and once when you make a request, the body of the response is downloaded immediately and the connection is closed. When the stream parameter is set to True when making the request, Requests cannot release the connection back to the pool unless you consume all the data or call Response.close and at our use case, we would like to keep the connection open and receive updates.
- The authentication mechanism we use for this request is OAuth 2.0 bearer token. Regarding it and callback function was shown and explained earlier within the post.
- Once the response is received we look for the HTTP status code. 200 is a success, otherwise we raise and Exception.
While we are here let me also highlight on a very important point, which is handling disconnection from the stream. There are various reasons to why we can get disconnected from the stream such as a network issue on our end, a temporary server side issue, our app is not keeping up with the volume of Tweets the stream is delivering, our account exceeded our daily/monthly quota of Tweets, and many more. The goal is to stay connected for as long as possible, recognizing that disconnects may occur. The endpoint provides a 20-second keep alive heartbeat. And once an established connection drops, we can attempt to reconnect immediately. If the reconnect fails, slow down your reconnect attempts according to the type of error experienced.
When a disconnection occurs we will receive a response similar to below screenshot, however, when we receive tweets the response body will contain the object "data" instead of "error". Hence, if we receive an object other than "data" we will raise an Exception and use a decorator function to retry and imply a delay each consecutive time we are handling an Exception. Within this demonstration I am not actually monitoring for different types of errors/disconnection that might occur instead if an Exception is raised for which ever reason we try to reconnect immediately. However, if you wish to observe the errors and perform the reconnection more efficiently feel free to do so and that would be the best practice.

Here is the retry decorator function that we will be using:

And this would be the amended function to connect to the stream:

Likes:
Manage Likes endpoints require two IDs: one for the user (the user who wishes to like a Tweet, in other words the id of the user with which we authenticated the application), and the other representing the Tweet ID that we are going to like or unlike. Both of these values can be collected from the tweet object responses we get from the stream. If you remember when we connected to the stream we did ask the Twitter API to send us these details.
For the ease of understanding let me show you one of these responses and refer to the fields in it:

Here the id field within the data object is the id of the tweet we just received. And now let us look into the list of users that are in the includes object. Each user object has the field id and this is the user ID for that particular user.
With those details in hand let's try to give a like to the new tweet we had received. Here is the function we use to perform this action:

Within this function we are:
- Doing a POST request to the endpoint https://api.twitter.com/2/users/:id/likes, that contains a JSON Payload with the "tweet_id" we wish to like.
- As you have already noticed we are using OAuth 1.0a session we created earlier at the authentication process.
- Once the response is received we look for the HTTP status code. 200 is a success, otherwise we raise and Exception. We also log the response to the screen so that we have details of what is going on.
Now that our function for like is ready let's do the amendments necessary on our stream function, so that the function associated with like is called with the required arguments when a new tweet is received:

Manage Tweets
With the Manage Tweets endpoint we have two methods that can be used to manage the tweets: which are POST and DELETE. The POST method allow us to post polls, quote Tweets, Tweet with reply settings, Tweet with geo, Tweet with media and tag users, and Tweet to Super Followers, in addition to other features. Likewise, the DELETE method allows us to delete a specific Tweet. As you have already guessed at this stage of project we are going to reply to the tweet using the POST method as explained.
Here is the function we use:

Within this function we are:
- Doing a POST request to the endpoint https://api.twitter.com/2/tweets, that contains a JSON Payload with the following:
- text: Text of the Tweet being created.
- reply: A JSON object that contains the Tweet ID of the Tweet being replied to.
- To do this request we are using OAuth 1.0a session we created earlier at the authentication process.
- Once the response is received we look for the HTTP status code. 201 is a success, otherwise we raise and Exception. We also log the response to the screen so that we have details of what is going on.
Lets do the final amendments on the stream function:

Here the additional codes we added are to:
- Collect the details of the user who tweeted from the Tweet Object response we got. We defined these user fields we when we did the initial POST request as explained earlier:
- id: The unique identifier of this user.
- name: The name of the user, as they’ve defined it on their profile.
- username: The Twitter screen name, handle, or alias that this user identifies themselves with.
- created_at: The UTC datetime that the user account was created on Twitter.
- public_metrics: Contains details about activity for this user
- Since the created date we got is UTC, to give it a local MV flavour I did convert the date to GMT+5 and formatted it using pytz and datetime. If you wish to you could skip doing this as these are just cosmetics rather than functional.
- Finally with these details we constructed the text body of the reply tweet and called the function reply with arguments as necessary.
Conclusion:
What we had built over this post is just a glimpse of what can be done using twitters API. If you put your brain in to it you could do wonders, such as analytics and so on. Now one is going to say that there are tons of tools that does the same - just like our brilliant, well educated and very wise two friends would have said. Yes there are many, but what if those out there do not really fit the client requirement? As I had mentioned earlier we have to Taylor-build one for the requirement.
Also as we conclude this post as well this chapter I would like to tell one last thing to our two very loved friends - "I speak when I know I can walk the talk... There you go, played the game in the field you built for me, and this would be the last reply from my end regarding this either what the outcome is going to be..."

